Monday, December 19, 2011

A Bunch of Little Things

So I've been working without blogging.  Guess that might be some sort of Pocketship sin.  While I was off being selfish and not sharing I got a lot of little things done.


I finally finished the interior fiberglassing.  Since I had been glassing over the limber holes as I was going I needed to clean those out.  As I was opening them up I noticed that they had grown much smaller with epoxy and I was concerned that water wouldn't drain properly.  The solution was to put a de-burring bit in my Dremel tool and go to town opening those up again.  The tool (along with the flexible extension) made quick work of the problem areas.


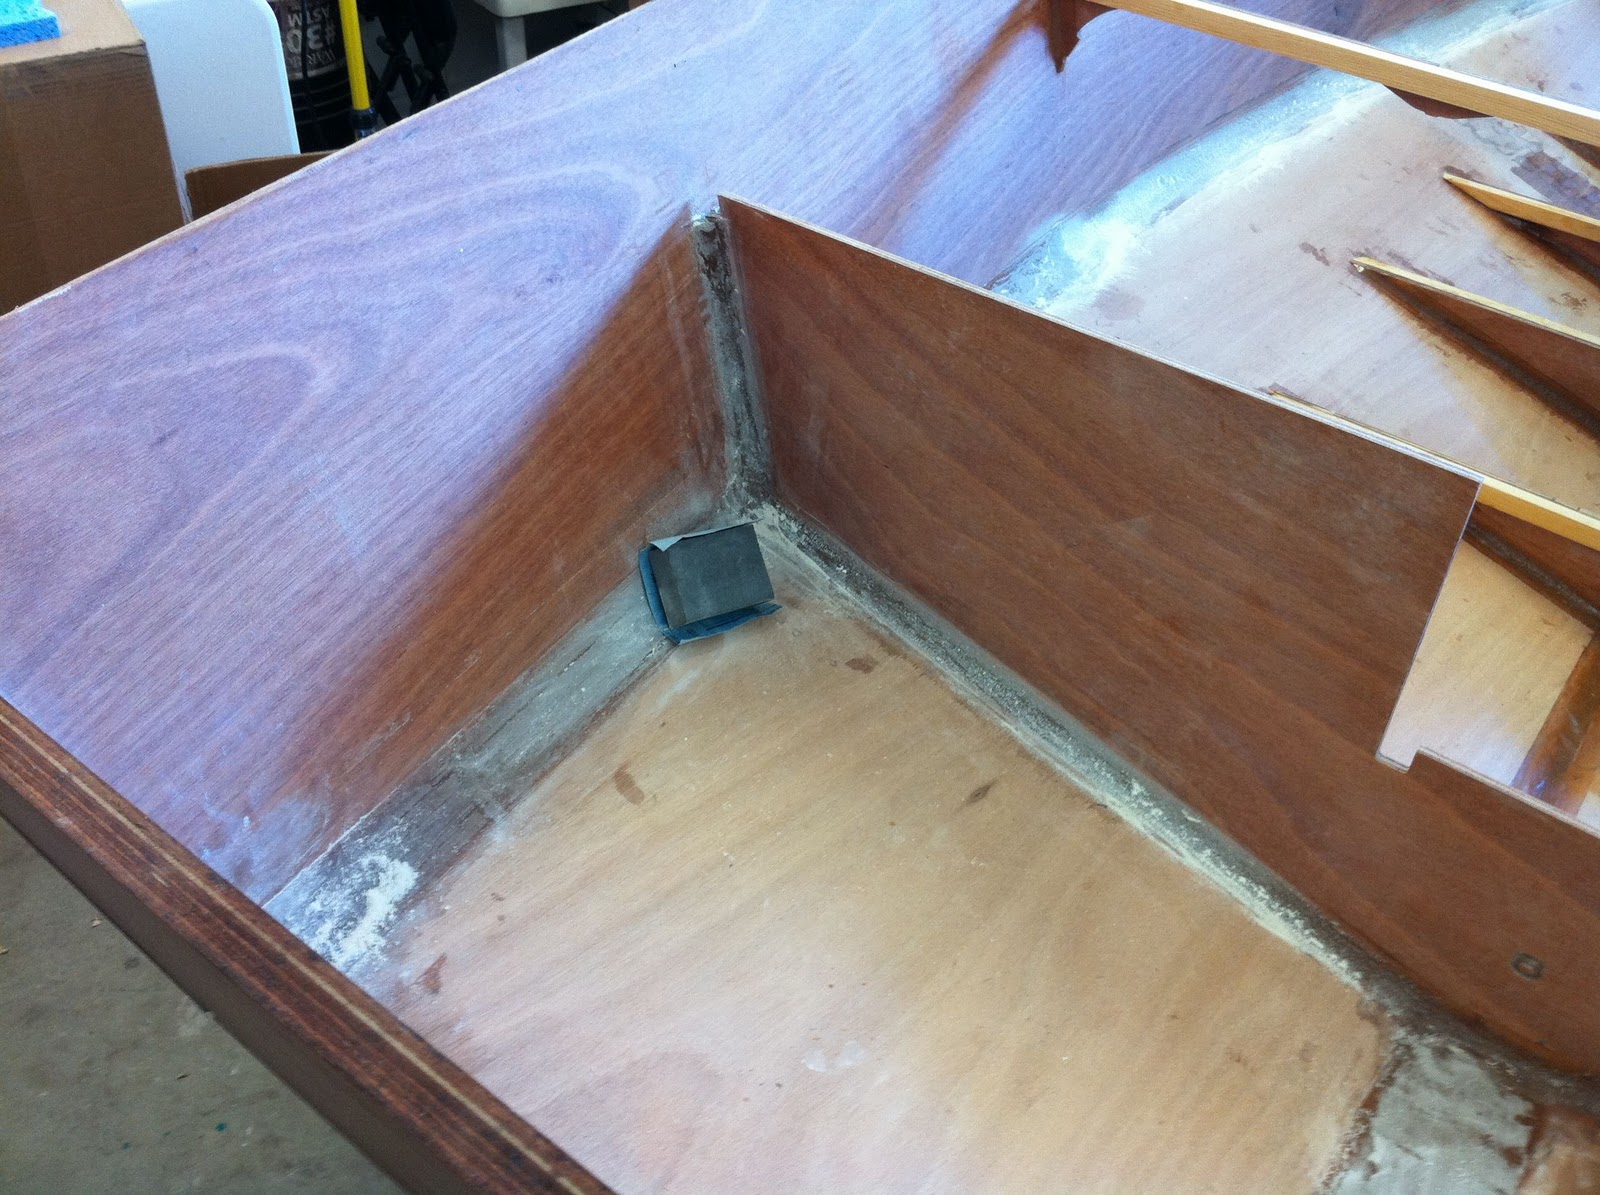
From there I turned my attention to some of the rough areas where I didn't do a good job of removing all the excess tab material from the bulkhead.  Again the Dremel tool with a  sanding big was an easy way to resolve those areas.


Since it had taken me so long to finish the interior fiberglassing I did a light sanding of the entire fiberglassed area.  According to the MAS epoxy instructions there is no problem with blush but that if you wait very long you should rough up the surface so that the next coat has something to "bite" into.


The second coat of epoxy went on fairly nice.  I'm going to do one more coat to make sure the weave is filled in every where but so far the results look nice.

Hours this session: 18
Hours total: 175
Hours remaining: 235

Tuesday, October 18, 2011

Rinse and Repeat

Nice weather in FL.  Kinda wet but I'm working in a garage.  I finished up scarfing my floorboards to length and to my dismay I'm short not in length but in amount.  Not just a little but by 1/3!  Luckily where I order my white oak from has free shipping so I don't feel so bad.

I finished glassing another bay and am working my way forward.  As a check to see how well I got things aligned I ran a tape measure from the point of the bow to each corner of the transom.  It came out with 1/4"!  Made me pretty happy.  I often find myself test fitting pieces and just sitting in my garage contemplating my work.  So far I'm very happy with the way this thing is going together.  Can't wait to finish the interior fiberglassing and sanding so I can move on.

Hours this session: 4
Hours total: 165
Hours remaining: 235

Sunday, October 2, 2011

Floor Board Work

Beautiful day here in FL.  Temp is topping out at about 83.  Nice for boat building.  So what I did was to go out early and fiberglass another bay.  While I was waiting for that to dry to green so that I could do the trimming, I cut dados in the ends of my white oak floor boards so that I can graft them together


I cut the dados in the end of 18 5' sections of floor boards.  Then mixed up a resin and 50/50 mix of wood flour and silica.  Slathered it on the ends and clamp them together.  Clean up as much of the excess as possible and wait for them to dry.


Once these dry I will run them through the planer and then relive the edges with a round over bit.  I plan on finishing these with oil.


Hours this session: 4
Hours total: 161
Hours remaining: 239

Monday, September 19, 2011

Cooling off in FL

 So it cooled off enough for me to start on the next bay.  Just a review of the process for those who have been asking.

1.  Tape off the area to be fiberglassed.  The INSIDE of the tape represents where the fiberglass edges will fall.  In the photo below there is an overlap of the glass from this bay to the ones on each side of it.

2.  Create a template from butcher's paper.

3.  Use the paper template to cut out the fiberglass.  I allow several inches on each side so that the fiberglass will overlap the tape.

4.  Do one LAST run over the area to be fiberglassed to make sure everything is absolutely smooth and every little crumb is removed.

5.  Lay down the fiberglass with epoxy.  Just enough to fill the weave

6.  Wait a few hours until the epoxy turns "green".

7.  Trim around the inside of the tape with a razor knife.

8.  Lift the tape (and the excess fiberglass) to leave a perfect edge.


Hours this session: 2
Hours total: 157
Hours remaining: 243


Thursday, July 28, 2011

Floorboard work

Not much happening in the way of the boat.  Florida is still in the grips of stifling heat.  I've been chomping at the bit to do anything and as soon as I start the heat turns me back.

One little project I did start was ripping my floor boards to width.  A little background on my choice of woods for the dimensional lumber.  For the floorboards I wanted something light in color and heavy in weight.  I figure the more weight I can get down low the less ballast I will have to use to trim out the boat.  So for the floorboards I went with white oak.  It's moderately heavy with a pleasing light color.

For the rub rails and other trim I wanted something darker.  For this I chose black walnut.  It has all the attributes of a good marine lumber and it is a very beautiful wood.  Now the choice of black walnut for a boat goes against naval superstitions.  The nick name for black walnut is "coffin wood".  I guess associating your boat in any way with a coffin brings bad nautical mojo down upon the craft.  Luckily I'm not superstitious.
There should be plenty of scrap left after doing the floor boards and the rub rails to use for laminating the tiller and the boom arch.  I think the contrasting light/dark wood in layers will look very nice.

I was able to source both these woods from an internet company (woodworkersssource.com).  They come in 4/4 10 board feet craft packs.  I ordered 20 board feet of the oak and 10 of the walnut.  I found that trying to order longer lengths drives the shipping way up since they have to be shipped freight.  So I resigned myself to having to scarf together at least a couple of sections of my floor boards.

A couple of nights ago after the sun had gone down I moved my table saw just outside the garage door and into the relatively cooler night air and began ripping.  In about an hour I had ripped as many of the 4" widths as I could make out of the oak.  I switch to my dado blade and made scarf cuts on 4 of the pieces.  After a little trial and error I got the scarfs to fit perfect.  My next project is to actually glue these together to make 2 10' lengths.

Hours this session: 2
Hours total: 155
Hours remaining: 245

Tuesday, June 14, 2011

Florida IS HOT

We're having a record heat wave here in FL.  I went out to the garage at 10:00 pm last night hoping it would be tolerable.  I decided to just do some odds and end like opening up some notches with my (very sharp) Japanese saw.  Buy the time I had taken a few strokes with the saw I was sweating like I had just came out of the shower.

Doesn't look like I'm going to get much done until this heat breaks.  Just hope I don't have to wait till November!

That being said I had always known that progress on this boat would be slow for the following (additional) reasons:

1.  I want to do a really good job.  I really like the looks of the Pocketship and don't want to rush anything.

2.  I work full time.  If I had full time to devote to the build I'd probably be done already but I do have a day job.

3.  I don't want to ignore my family.  My wife already mildly resents the boat in the garage.  I don't want to give her a reason to take an axe to it.

4.  I have other obligations that still must be met.  I teach karate 3 times a week and have been involved for more than 40 years.

Consequently, the absolute MOST time that I can put in is about 4-6 hours on weekends and 3 - 4 hours during the week.  So IF the heat allows me I can get in about 10 hours a week.  Not really very much.

I don't really mind.  I still own my other boat (a West Wight Potter 19) that lets me get out on the water.  I will be selling it when the Pocketship gets close to completion so the Pocketship needs to be a superior replacement for the P-19.

I'll keep updating whenever I do any little thing but I need the temp to drop down to at least the upper 80's before I can do anything serious.

Tuesday, May 24, 2011

Slow going

So I've completed the glassing between bulkheads 7 and 8.  The more I do this the better I'm getting (duh!).  I've prepared the areas between 6 and 7 and it'll be ready to go as soon as I find the time and temperature.  Central Florida highs have been in the mid 90's.

I had to put the project on hold for a couple of weeks to rebuild the master shower in my house.  When I took on the job I though it was going to be a 1-2 day project.  The background about 2 weeks ago a couple of the 4 1/2" tiles that make up the walls of my master shower fell off.  The green board behind was wet so I figured I replace a small area with backer board and re-tile.  I took a day off work and started.

When I began pulling the tile down I realized the wet area was much bigger than I thought.  Almost an entire 5X6' wall.  After pulling down the green board I realized that a prior termite infestation had destroyed most of the studs in the wall along with much of the insulation.  To make a long story short I had to rebuild the entire wall, re-insulate and then install the backer board.

When I got the the reinstall of the backer board I realized that it was only 1/2 the thickness of the old green board (doh!).  Luckily some of the scrap marine plywood stock was just the right thickness to shim it out.  I cut shims for the length of the studs and screwed them on.  In the end it all worked out.  Tile and grouting job looks good even though I'm no pro.

Lessons learned:
1.  Something always crops up that will delay the boat build.
2.  Never throw that scrap away!
3.  I can never finish even the most complex job fast enough for my wife.

Hours this session: 6
Hours total: 153
Hours remaining: 247

Tuesday, April 19, 2011

Aft Bay Fiberglassing Pt 2

Quick note.  Finished the other half of the aft bay fiberglassing.  Pretty happy with the total result.  I do have one small bubble in the corner that I will have to deal with after all the other bays are finished (I'm sure there will be other oopsies to deal with and I'd just like to do them all at one time).

Hours this session: 3
Hours total: 147
Hours remaining: 253

Sunday, April 17, 2011

Aft Bay Fiberglassing Pt 1

I went over every inch of the aft bay and decided that it was smooth enough to fiberglass.  Up to this point I hadn't glassed any complex areas, just flat and smooth surfaces.  The other boats I build I cut the glass freehand and kinda just figured it out.  Since I want a higher quality finish on this boat I spent a little more time.

I first outlined the area to be fiberglassed with a 3" wide border of blue masking tape.  For the aft bay the fiberglass was to come up each side and overlap the center by 6".  Then I made a paper pattern to use as a guide for cutting the fiberglass.  This was actually the hardest part of the process, paper doesn't conform to curves and bends as well as fiberglass.  Knowing this, I figured that if I'm close with the paper the fiberglass will fall into place.  Luckily I was right.  In the end I had to cut the paper in sections and tape each of the sections together.  Luckily I can use the same pattern for both sides of the aft keel by simply flipping it over.

I used a long metal ruler and a razor to cut along the edges of the pattern.  After each cut I put masking tape on the edge of the material to keep it from raveling.

At this point tape holds the fiberglass in place completely covering the blue tape border outlining the area to be fiberglassed.

The above picture shows the finished product.  It's kinda hard to take pictures with sticky gloves on so I'll describe what the pictures missed.

I wet out the fiberglass with un-thickened epoxy.  Starting with the bottom I worked the epoxy out to the edges and then using a brush, up the sides up to and slightly overlapping the blue border tape.  I went back over everything while it was still wet to make sure that there were no bubbles or anything keeping the fiberglass from laying flat.

Note: I did find a small crumb under the fiberglass near the center.  Doh!  I made a small incision with an x-acto knife in the fiberglass weave and retrieved the crumb.  Then pressed down the fiberglass without any further problem.  After it dried I couldn't even find the problem area.

After the epoxy dried to a "green stage" I ran a razor knife around the lower edge of the blue border and then lifted the border tape up along with the excess fiberglass to form a perfect straight edge.

With the exception of getting a little more epoxy on certain areas that I really wanted to It turned out near perfect.  I really like this technique of applying fiberglass and will continue to refine it while doing the rest of the bays.

Hours this session: 3
Hours total: 144
Hours remaining: 256

Friday, April 15, 2011

More Filleting Work

After doing a diligent job of sanding the fillets in the aft compartment I found that some were going to have to be repaired.

There were several low areas that needed to be raised and a few "holes" or "voids" in the fillets.  I attribute the holes to getting the filleting material a little too thick and it "pulling" while going over it with the filleting tools.

In the end I mixed up a little bit more filleting material (no silica since the problem areas were so small and didn't affect the structure and I wanted something easy to sand) and filled in the areas in question.  A little sanding and all is well.

My intention is to fiberglass the rear bay first.  This area is mostly hidden and is used as storage so I'll be able to judge my skills and learn without affecting the final look of the boat (much).  Then take that knowledge and work forward bay by bay first dressing out the fillets and then glassing until the interior glass work is done.

My floor board lumber arrived last week and I spent about an hour ripping about half the stock it to width.  I'm going to have to make a few splices since I couldn't find any stock in my price range for the longest floorboards.  I'm using white oak for the floorboards and black walnut for the rub and toe rails.  I picked the white oak for a several of reasons.  I don't want the interior to look like a cave and the light wood should brighten it up and the weight of the white oak should reduce the amount of ballast I need in the bilges.   I should also have enough left over to laminate the tiller and other parts.  I think the light/dark contrast of those two woods will look great.

Work is going slow right now.  Summer has made an early appearance here in FL and working in a non-AC garage is brutal during the day time.  Nothing like being coated in sweat that's been thickened by sanding dust!

Hours this session: 3
Hours total: 141
Hours remaining: 259

Sunday, April 3, 2011

Finishing up the Fillets

Been a slow month at the boat building yard.  Other diversions have taken precedence over the build.  Still been doing a little work here and there.  Today I did quite a bit of fillet sanding in ernest.  In the final filleting evaluation I would say that I did a good (but not great job).  There are many places to touch up and several holes and low spots to fix.  Not too bad but enough where it will take a half dozen or so more hours.

My cheap multi-tool.  It does makes short work of high spots and gets into corners well.


I use 80 grit wrapped around a sanders sponge for most of the work.


The long side fillet on the port side turned out well and will need little sanding.  

Godo view of the completed floor board fillets.  Note the boards across the floor boards on the starboard side.  They make working from the interior much easier.

This is one of my better fillets.  Not much more will have to be done to this one.

Hours this session: 8
Hours total: 138
Hours remaining: 262

Tuesday, March 1, 2011

Filleting and more masking

No picts this time.  Just building on what I was doing in the last post.  I finished the fillets at the chine and started to mask the areas around the floorboards.  This was a little tricky.  There are a lot of places to mask.  In front and behind each floor support and each side where it meets the CB trunk and then the keel itself.

Most of it needs to be done from inside the boat unless your an orangutan.  Walking around in the inside of the yet to be fiber glassed hull is a little disconcerting.  So I got a couple of old boards and laid them across the tops of the tack welded floor supports.  That creates a nice stable platform and its a lot easier to do accurate work.

I can finally see the end of the hull filleting.  I've been having a good slow long go at it and learning more along the way.


Hours this session: 4
Hours total: 130
Hours remaining: 270

Sunday, February 13, 2011

Forward Floorboard Support Fix

I gave a lot of thought about how the remedy for the front floor support being almost 1/2" too high.  I originally was going to trim the top down by the offending amount and add that amount to the underside of the support.

That didn't go so well.  I was unable to come up with a jig that would allow that precise a cut to be done in that small an area.  I tried but all I managed to do was mangle the floor support.

So I broke out my flush cut Dremel tool (the one I blogged about my wife getting me for X-Mas).  This fantastic little tool did a wonderful job of removing what was left of the old support without damage to bulkhead #2.

The rest was pretty easy.  I made a paper template of the support in the new location and I cut a new support to fit.  Since there wasn't a way to clamp it in place I had to hold it to the bulkhead with a couple of temporary screws.  I was even able to find a couple of screws that wouldn't penetrate the bulkhead.  All in all it looks very good.  Little touch up work and you'd never know that I had a problem here.


Since last time I also removed the "punch out" sections from bulkhead #6.  I used my japanese saw to make the cuts but there is still some touchup work that I will have to do with the Dremel rotary sander.  This was a little premature according the the sequence in the manual.  But I wanted a continuous fillet and didn't want to have to fill it in later.


I taped the chine and the bulkhead #2 in preparation for filleting and then I removed the last of the stitches (not actually the last I still have one left in the bow that is totally encased in a fillet.  I had to leave it in place in order to keep the bow closed.  Once that bow area is fiberglassed I'll heat it up and pull it out.


Hours this session: 4
Hours total: 126
Hours remaining: 274

Saturday, February 5, 2011

Filleting the Bow

No pictures on this one.  Just the same process for the bow.  The only items left to fillet are the main cabin chine area, keelson, and the floorboards.

Hours this session: 4
Hours total: 122
Hours remaining: 280

Sunday, January 23, 2011

Structural Filleting, Part 1

Been a while since I updated this site.  Had some family issues that kept me from doing much for the last 3 weeks.  But I'm back to work now.


When I left off I had masked the area between bulkhead 8 and the transom for filleting.  Got those done and they turned out pretty nice.


I filleted the center section under the footwell with one big fillet instead of two smaller ones.  It was work to get it right but it turned out nice.


Moving forward I did the next bay.  Since the center area is wider here I used two smaller fillets on the keelson-hull joint


I've masked the area between bulkhead 1 and 2 and removed the stitches in preparation for filleting.


Next up:  Continuing the process of structural filleting.

Hours this session: 8
Hours total: 118
Hours remaining: 284

Friday, January 7, 2011

Masking the Water Tight Bulkhead Area for Filleting

I finished the tack weld step.  Gotta be kinda a contortionist to get to all the places.  I've got aches in places I forgot I had.

In preparation for the final filleting I masked off the area behind the watertight bulkhead.  This was done by:
1.  Removing the stitches in this area.
1.  Deciding what radius I wanted to use on a specific seam.
2.  Inscribing the radius on the seam using a compass.
3.  Taping to the radius lines.

The idea behind this is that it makes the fillets much more even, reduces sanding and overflow cleanup.  I've done this before on other boats I've built and I think it is well worth the time.


Notice that the vertical corners of the transom have not been taped off.  I ran out of tape!  So time to take a break.

Hours this session: 4
Hours total: 110
Hours remaining: 292

Sunday, January 2, 2011

First Tack Welds

The two steps that I tackled today was to glue bulkhead #7 and floor support #4 to the centerboard trunk and to create the tack-welds.

Bulkhead #7 was no problem since I hadn't stitched it in completely to allow for the temporary screws.  I masked off the edge of the trunk and the mating edges of the bulkhead to keep squeeze out to a minimum.  That part worked perfectly.  I then finished the stitches and all went easy.


Floor support #4 was another manner.  It was lightly stitched in and wouldn't pull out very far which made it difficult to get epoxy behind it.  In the end I prevailed and while I was there I created the fillets for this floor board on the C/B trunk.


Now that everything in the lower hull is in final place I started to do the "tack weld" step.  The idea behind this is to run thickened epoxy between all the stitches.  This glues everything together so that most of the stitches can be removed (crap... I just got them all in!!!).  These tack welds must be made small enough that they will be completely covered by the final structural fillet.


My first attempt at the "pastry bag" method was a minor disaster.  I cut the corner too deeply and thickened epoxy gushed out much too quickly to create the small fillets.  When I realized this, I immediately transferred the unused epoxy to a new zip lock bag and cut a much smaller hole.  This time it worked perfectly and created fairly nice tack welds.  I smoothed out and cleaned up the areas where I didn't get it quite right.


I repeated this process and did about 1/3 of the boat before I had to stop and take the wife to dinner.

I'll let this dry and get on it again for the next session.

Hours this session: 6
Hours total: 106
Hours remaining: 296

Saturday, January 1, 2011

A Little Problem

If you check out this link it'll explain the problem that I found.

http://www.pocketship.net/phpbb/viewtopic.php?f=3&t=207

Basically all but the floor support at bulkhead #2 line up perfectly.  However, the pre-glued support at bulkhead #2 is about 1/2" too high.

It doesn't seem like I've made any measurement or assembly mistakes.  I have an idea of how I can remedy this situation, but I'd sure like to know what went wrong.