Sunday, December 29, 2013

Topsides Painting and U-Bolt

The topsides turned out rather well.  I chose to roll and tip the topsides because I was afraid of the surface complexity and my competency at using the sprayer.


Rolling and tipping with WR-LPU is a nerve racking experience.  The first coat looks so god awful bad that it's hard to believe that it will work out in the end.


I ended up doing 4 coats of color and 3 coats of clear over everything.  Each coat took about 3 hours to apply.  You can't wait more than 24 hours between coats of the WR-LPU otherwise you have to sand the prior coats.  I had to plan out about 3 days of work to get it all done correctly.


Had a few little runs, drips and sags but nothing that couldn't be taken care of.


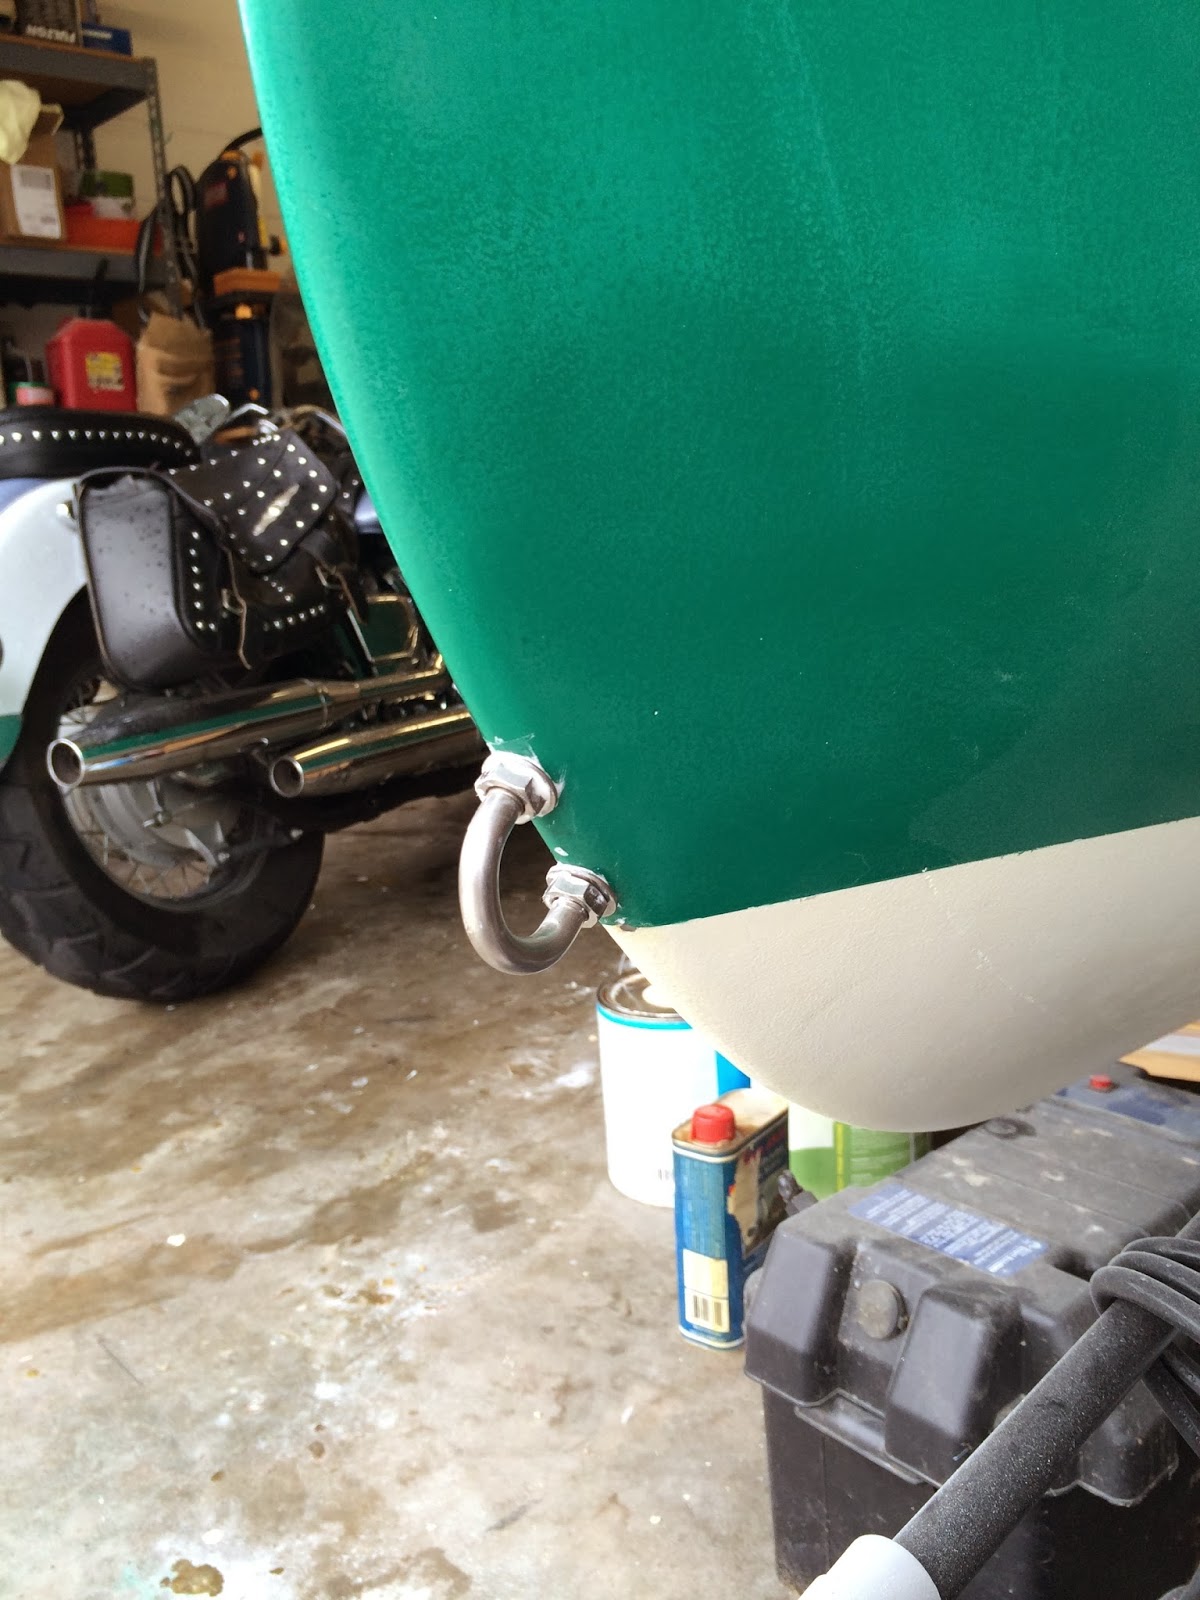
I decided to drill the first holes in the hull for the U-bolt.  It was more than a little terrifying to drill holes in my nice hull.  Incidentally this is one of the few places that the manual is a little fuzzy.  The location is noted on the plans but require you to extrapolate the location on the boat.  After a bunch of calculations and measuring I put drill to wood.

Part of my trepidation was that I set the access tube in the front compartment more than a year ago.  I couldn't find the sheet that I had used to make the calculations back then.  So I was trusting that I was going to hit that location with my new set of calculations.  In theory it should work out the same all the time.  Luckily for me that theory held true in this case.  The two holes were almost perfectly centered in the access tube.

The U-bolt supplied by CLC in their "Hull Hardware Package" had legs that were about 1 1/2" too long.  This wouldn't be a problem if I could get a conventional wrench down that access tube.  That tube is only 6" in diameter so there isn't much room to work.  I had to use a socket extension on a 24" T-Bar to reach the nuts.  The socket meant that the legs couldn't extend too far out of the nuts or the socket would loose purchase.  A few measurements and calculations cumulating in about 5 minutes with a dremel cutoff wheel and all was well.  Slather on some 5200 and tighten up the nuts and the deal is done.


Hours this session: 21
Hours total: 639

Wednesday, December 18, 2013

Topside Priming and Sanding

The priming of the topsides took 3 coats of high build primer.  Even then there were a few places that I had to go back over and fill with fairing compound.  It's amazing how many imperfections you can find in a perfect finish!


Sanding this primer is very easy and makes for a silky smooth surface.  All that was required was a very light sanding to produce a great surface.  It's easy to sand through and I did in a couple of places.  I don't worry about it too much as long as the surface is fair the WR-LPU will produce a nice finish.

The plan from here is to mask the topsides and paint with three coats of color (white).  Then remove the mask and cover the color and the brightwork in three coats of clear.  This will provide a nice gloss for the topsides and protect the brightwork from UV deterioration.


The green tape is a automotive masking tape that makes a very fine line.  The primer is thick and I can use regular painters tape for that but the WR-LPU paint is very thin and often runs under painter tape.  Even though the automotive tape is expensive it provides a very razor fine paint line.  For those of you following along at home just make sure you "burnish" the edge of the fine line tape.  I use a spoon and go over every square inch of tape.


Hours this session: 8
Hours total: 618

Thursday, December 5, 2013

Topsides Sanding and Masking

I procrastinated a little while before sanding the topsides.  But once I got started it went quickly.  The hardest part of the sanding was the anchor well.  Lots of crevices in there to get smooth.


My plan is to prime all the non-masked areas with high build primer do a quick sanding with 220 and then paint.  I'll shoot several coats of color on the masked area and then a few coats of clear on everything.  That should give a good gloss to the paint and a nice look to the unpainted areas.  I need to do some anti-skid on the cabin roof.


I need to start working on the spars and I need to order my hardware.  I'm starting to think about the hardware I need and fitting out.  I'll probably just go the easy route and get it from CLC.  

Hours this session: 16
Hours total: 610

Sunday, October 27, 2013

Reflpping

I added some carpet to the cradle and attached it to the boat with a webbing line.  After that it was a simple matter of reversing the way that I had rolled it over in the first place.  'Nuf said.


Special thanks to my rolling crew.  Nick, Kris, Rob, Mark, and Scott.

Hours this session: 2
Hours total: 594

Wednesday, October 16, 2013

Ready for Flipping Again

I finished painting the hard to reach parts of the cabin while the boat was upside down.  White for the top of the storage area between bulkheads #1 and #2.  And clear for the other places like the cabin and berth ceilings.  I really love the way the WR-LPU clear makes the okume plywood look.  It really brings out the grain.

I know I'm starting to sound like a broken record but working in the heat in Florida, under a boat with construction lights blazing is a tough act.  My lovely wife had the foresight when I started this project to buy me a large shop fan that sits low to the ground and can be directed in any vertical orientation.  Once I set that up to blow under where I was in the cabin it became much more tolerable.

All the inverted work is now complete and I will be getting the gang together for another rollover in the next week or so.  The plan is to refit the cutdown cradle while the boat is still inverted and secure it with cargo straps.  Then get the guys over and re-roll it back over to sit in the cradle.

Once that is done it's just a matter of prepping and painting the topsides and building the mast, tabernacle, and boom support then adding the hardware and we'll be sailing.  It's feeling close now!

Hours this session: 4
Hours total: 592

Monday, September 2, 2013

Centerboard and Keel Protector

After many hours of wet-sanding and rubbing compound and polishing and waxing the hull looks pretty good.  Even though it was labor intensive I think I would rather do the work then wait out the Florida summer.  Maybe...


The final product looks really nice.  I thought about putting a second water line on the hull but I think this looks nice and I'm really not up for the extra work.  I might try some white vinyl tape to see how it would look and make a final decision.


The rub rails look nice also.

As you can see, I installed the centerboard in the trunk.  With a little help from my daughter, it went in easy.  I had installed a fish line before I rolled the hull and it was trivial to pull the centerboard painter into the cockpit.  Glad I did that.  I think it saved me some frustration working under the hull in this hot weather.


A while back I purchased this 3/4" half oval stainless steel for the purpose of protecting the bottom of the keel.  This is installed with 1 1/2" SS #10 oval head wood screws bedded in 5200.  I haven't done the short section on the front as I was one screw short -- wife's been telling me that for years.


I'm getting more excited.  I've got some painting to do in the cabin before I flip this thing upright.  And then it's endless topside sanding and painting.  I still need to order the wood for the mast, boom and yard and build those.

Hours this session: 3
Hours total: 588


Sunday, August 25, 2013

Painting the Hull

I've a proponent of System 3 WR-LPU (Water Reducible Linear Poly Urethane) since it is water soluble easy to roll or spray and provides very nice result -- most of the time.


I prepared the hull with high build primer meant for this kind of paint and sanded it smooth.  So far so good.


Then I sprayed the "Mercer Green" color coats.  Had a few runs but nothing I couldn't take care of.  So far ok. 


Then sprayed the gloss coats.  Ugh! Blushing!  Very bad bad blushing.  Crap!  Called the System 3 rep.  Said I would have to wet sand to bring out the gloss.  More sanding... so sad.


Started with 600 grit.  So far this is what the boat looks like.  A lot of the blotchiness in the photos are because of dust from the wet sand.  It does look a lot better but I've got about 4 more circuits to go before I get to 2000 grit.


After that I will use 3000 grit rubbing compounds and then finishing compound with wax.


The initial run seem good and it's getting better with each pass so I think I'm going to be ok.


Hours this session: 24
Hours total: 585

Saturday, August 3, 2013

Some Fairing and Anti-Fouling

This is the third stitch and glue boat that I've built and by far the most ambitious.  One thing my short span as a boat builder has taught me is that no matter how careful you are.  No matter how well you sand.  No mater what precautions you take there is always some filling and sanding to do right before you put the first coat of paint on.


I had a few divots and empty spots at the aft end of the keel that I filled with fairing compound.


On the aft port hull bottom I had some "starved" areas that didn't get a good epoxy fill.  These areas I simply filled with epoxy and putt peel-ply over the top to reduce the amount of sanding.


In the area above I had sanded through the weave.  I cut an oversized patch of fiberglass and epoxied it in place and again covered it with peel-ply to try to make it feather in.  In the end this worked exceptionally well and the area only needed a little touch up sanding... maybe 5 minutes worth.


This is a ding I put in it when I didn't wait for my sander to stop before putting it down.  This put a nice cresent shaped arc into the wood.  Filled this with fairing compound and it's like it never happened.


So I didn't get any pictures of me striking the water line.  I did have some difficulty with this.  My laser level is kinda a cheap one and it wouldn't shoot very far down the curved hull.  I ended up using a combination of a home made water level and the laser.  I would strike points on the hull about 6' apart and use these points as center points to mount the laser and then level the laser and shoot to each side.  In the end it worked VERY well and I don't think I could have gotten it much closer.


As you can see the Interlux 33 went on very nice and even.


The automotive fine detailing tape I used to mask the bottom really did a good job at keeping out the bleed through


My only mistake is this little drip I got on the side of the hull.  A little sanding took this off nicely.


I did this early in the morning but it's still summer in FL and this stuff dried very quickly.
Hours this session: 10
Hours total: 561

Friday, July 19, 2013

Working On the Bottom

Since the last installment I finished the fiberglassing of the hull bottom and the two coats of epoxy filler. The hull looks pretty good.  I've found a couple of areas that will have to filled/reworked but IMHO a very small amount for a boat this size.


I've started on the sanding of the hull.  As you can tell by the pictures I've got the bottom, transom and part of one of the sides rough sanded with 100 grit.  My calculation indicate that it will be a full 24 hours of work to get the bottom ready to paint.


The plan is to work the 100 grit until all of the shiny is gone.  and then do a fast once over with 220. Then I will use strike the water line and use the trilux below that.  The sides will be primed and coated with WR-LPU.  Green will be my color of choice.


The hull bottom was easy sanding since I could stand in a relaxed position and let the sander glide over most of the surface.  The sides are a different matter.  I either have to bend at the waste, sit on a stool or squat down and hold the sander against the surface.  I anticipate the keel to be the hardest part of this job since I'm going to have to hold the sander at almost arms length and be on a stool to reach it.


Hours this session: 18
Hours total: 551