Quick note. Finished the other half of the aft bay fiberglassing. Pretty happy with the total result. I do have one small bubble in the corner that I will have to deal with after all the other bays are finished (I'm sure there will be other oopsies to deal with and I'd just like to do them all at one time).
Hours this session: 3
Hours total: 147
Hours remaining: 253
Tuesday, April 19, 2011
Sunday, April 17, 2011
Aft Bay Fiberglassing Pt 1
I went over every inch of the aft bay and decided that it was smooth enough to fiberglass. Up to this point I hadn't glassed any complex areas, just flat and smooth surfaces. The other boats I build I cut the glass freehand and kinda just figured it out. Since I want a higher quality finish on this boat I spent a little more time.
 I first outlined the area to be fiberglassed with a 3" wide border of blue masking tape. For the aft bay the fiberglass was to come up each side and overlap the center by 6". Then I made a paper pattern to use as a guide for cutting the fiberglass. This was actually the hardest part of the process, paper doesn't conform to curves and bends as well as fiberglass. Knowing this, I figured that if I'm close with the paper the fiberglass will fall into place. Luckily I was right. In the end I had to cut the paper in sections and tape each of the sections together. Luckily I can use the same pattern for both sides of the aft keel by simply flipping it over.
 I used a long metal ruler and a razor to cut along the edges of the pattern. After each cut I put masking tape on the edge of the material to keep it from raveling.
 At this point tape holds the fiberglass in place completely covering the blue tape border outlining the area to be fiberglassed.
 The above picture shows the finished product. It's kinda hard to take pictures with sticky gloves on so I'll describe what the pictures missed.
I wet out the fiberglass with un-thickened epoxy. Starting with the bottom I worked the epoxy out to the edges and then using a brush, up the sides up to and slightly overlapping the blue border tape. I went back over everything while it was still wet to make sure that there were no bubbles or anything keeping the fiberglass from laying flat.
Note: I did find a small crumb under the fiberglass near the center. Doh! I made a small incision with an x-acto knife in the fiberglass weave and retrieved the crumb. Then pressed down the fiberglass without any further problem. After it dried I couldn't even find the problem area.
 After the epoxy dried to a "green stage" I ran a razor knife around the lower edge of the blue border and then lifted the border tape up along with the excess fiberglass to form a perfect straight edge.
With the exception of getting a little more epoxy on certain areas that I really wanted to It turned out near perfect. I really like this technique of applying fiberglass and will continue to refine it while doing the rest of the bays.
Hours this session: 3
Hours total: 144
Hours remaining: 256


I wet out the fiberglass with un-thickened epoxy. Starting with the bottom I worked the epoxy out to the edges and then using a brush, up the sides up to and slightly overlapping the blue border tape. I went back over everything while it was still wet to make sure that there were no bubbles or anything keeping the fiberglass from laying flat.
Note: I did find a small crumb under the fiberglass near the center. Doh! I made a small incision with an x-acto knife in the fiberglass weave and retrieved the crumb. Then pressed down the fiberglass without any further problem. After it dried I couldn't even find the problem area.

With the exception of getting a little more epoxy on certain areas that I really wanted to It turned out near perfect. I really like this technique of applying fiberglass and will continue to refine it while doing the rest of the bays.
Hours this session: 3
Hours total: 144
Hours remaining: 256
Friday, April 15, 2011
More Filleting Work
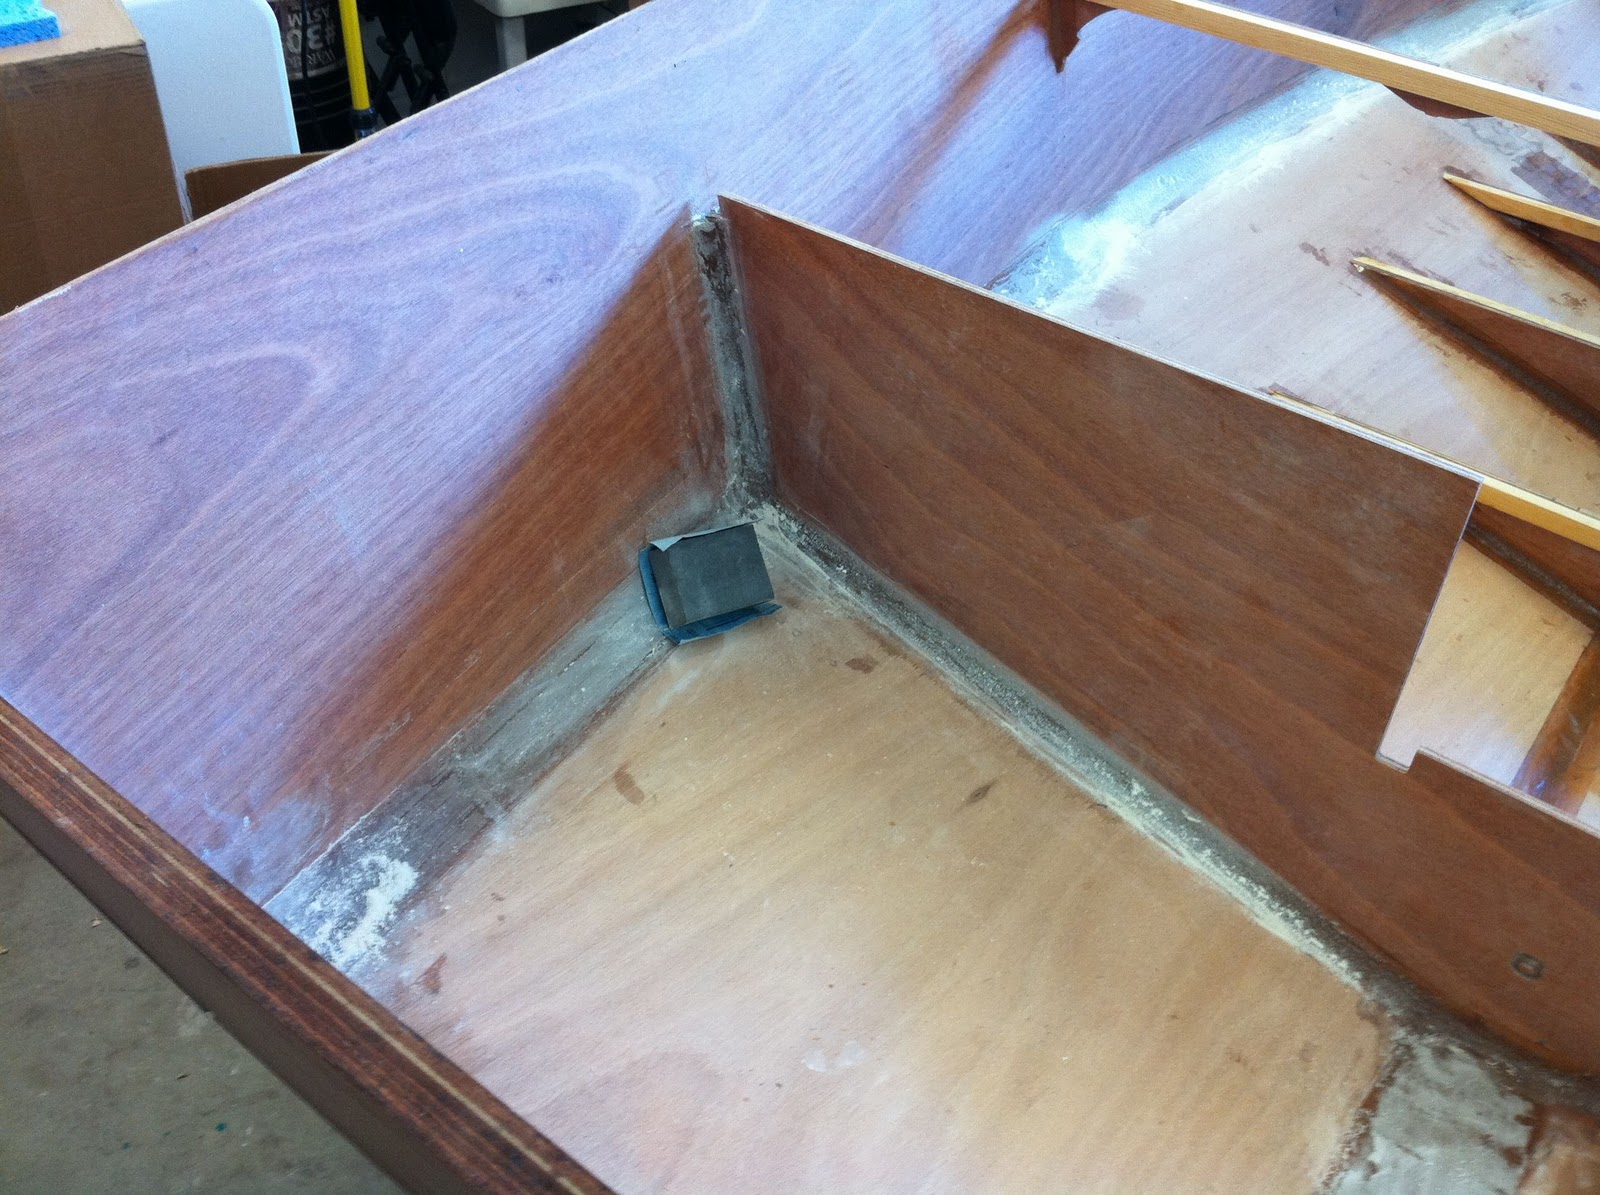
After doing a diligent job of sanding the fillets in the aft compartment I found that some were going to have to be repaired.
There were several low areas that needed to be raised and a few "holes" or "voids" in the fillets. I attribute the holes to getting the filleting material a little too thick and it "pulling" while going over it with the filleting tools.
In the end I mixed up a little bit more filleting material (no silica since the problem areas were so small and didn't affect the structure and I wanted something easy to sand) and filled in the areas in question. A little sanding and all is well.
My intention is to fiberglass the rear bay first. This area is mostly hidden and is used as storage so I'll be able to judge my skills and learn without affecting the final look of the boat (much). Then take that knowledge and work forward bay by bay first dressing out the fillets and then glassing until the interior glass work is done.
My floor board lumber arrived last week and I spent about an hour ripping about half the stock it to width. I'm going to have to make a few splices since I couldn't find any stock in my price range for the longest floorboards. I'm using white oak for the floorboards and black walnut for the rub and toe rails. I picked the white oak for a several of reasons. I don't want the interior to look like a cave and the light wood should brighten it up and the weight of the white oak should reduce the amount of ballast I need in the bilges. I should also have enough left over to laminate the tiller and other parts. I think the light/dark contrast of those two woods will look great.
Work is going slow right now. Summer has made an early appearance here in FL and working in a non-AC garage is brutal during the day time. Nothing like being coated in sweat that's been thickened by sanding dust!
Hours this session: 3
Hours total: 141
Hours remaining: 259
Sunday, April 3, 2011
Finishing up the Fillets
Been a slow month at the boat building yard. Other diversions have taken precedence over the build. Still been doing a little work here and there. Today I did quite a bit of fillet sanding in ernest. In the final filleting evaluation I would say that I did a good (but not great job). There are many places to touch up and several holes and low spots to fix. Not too bad but enough where it will take a half dozen or so more hours.
 My cheap multi-tool. It does makes short work of high spots and gets into corners well.
 I use 80 grit wrapped around a sanders sponge for most of the work.
 The long side fillet on the port side turned out well and will need little sanding.
 Godo view of the completed floor board fillets. Note the boards across the floor boards on the starboard side. They make working from the interior much easier.
 This is one of my better fillets. Not much more will have to be done to this one.
Hours this session: 8
Hours total: 138
Hours remaining: 262


Hours this session: 8
Hours total: 138
Hours remaining: 262
Subscribe to:
Posts (Atom)