Monday, December 31, 2012

Top Sides Fiberglassing and Misc Woodwork

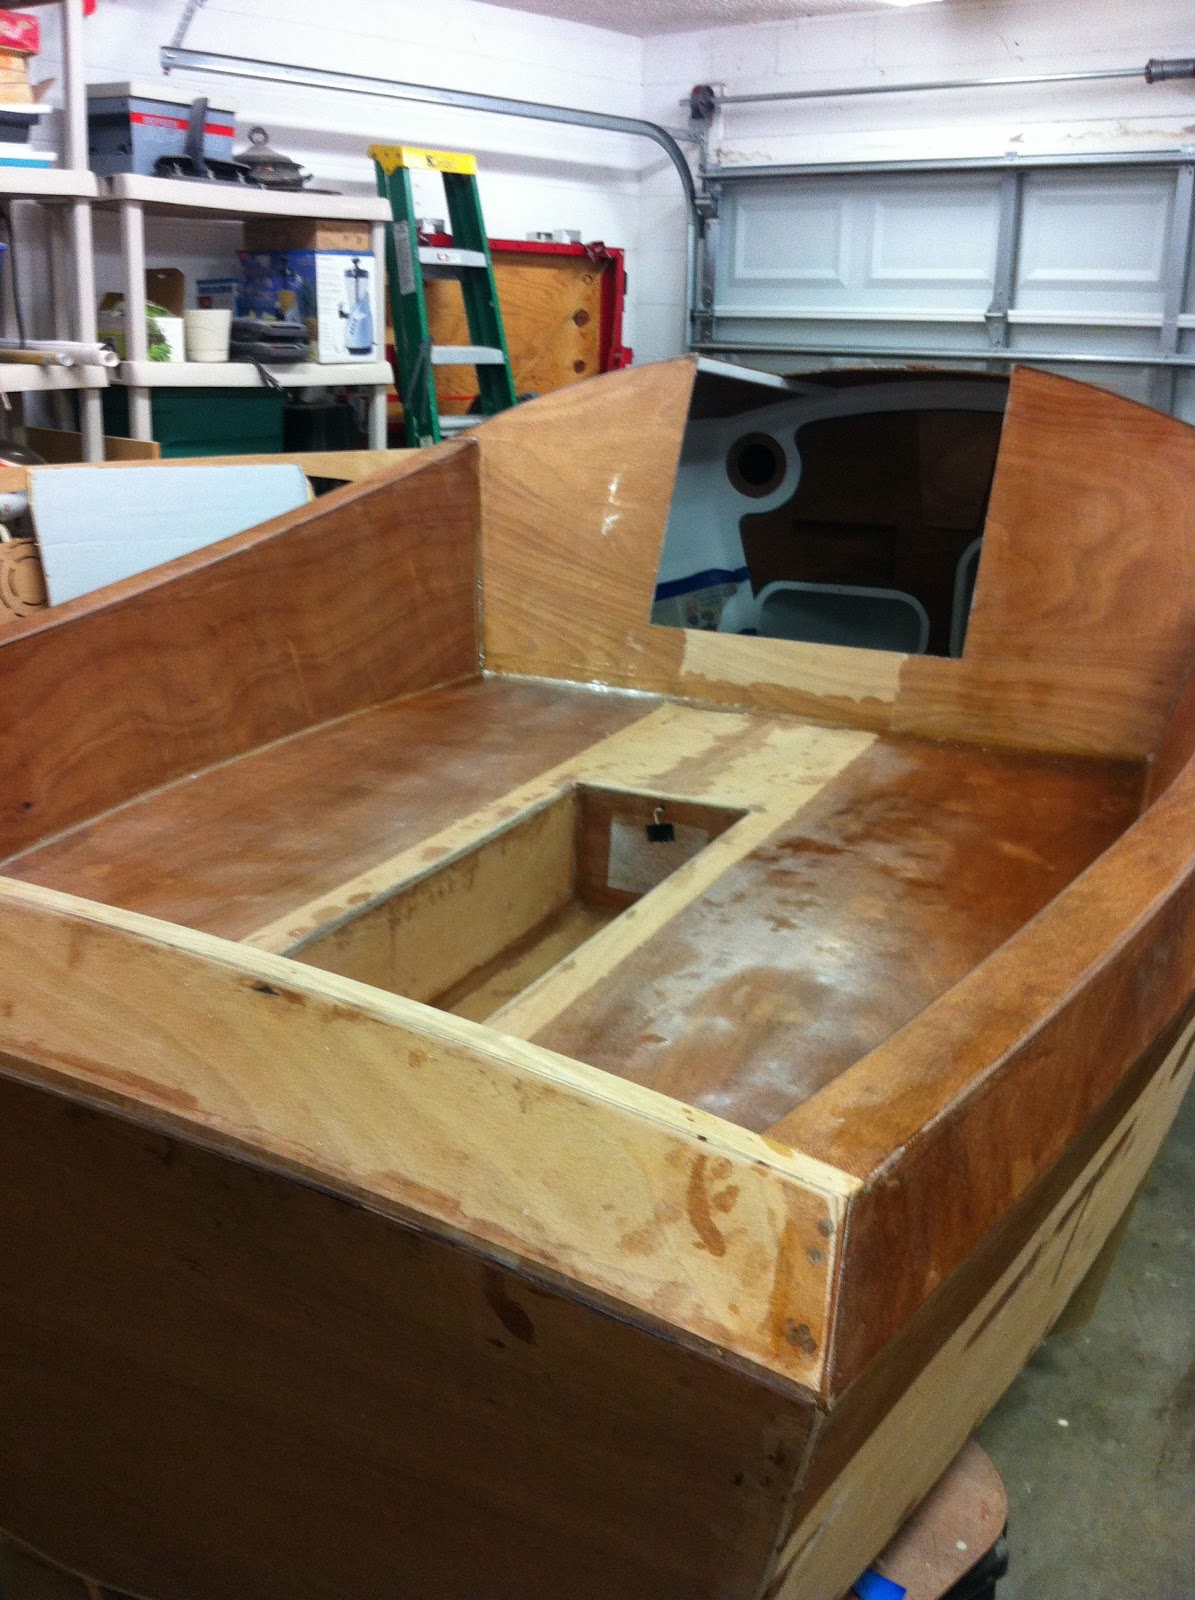
After finishing glassing the footwell I moved on to the cabin top and the remainder of the front.  This all was much easier work than the footwell (see last post).  It went quickly without any issues.


I chose to use one piece of fiberglass to wrap around the front of the boat to the opposite side.


I made some additions to the fiberglass schedule on the front of the cabin top.  Before continuing the fiberglass down over the front of the cabin top I added an additional layer of biaxial tape along the front edge.  This is in response to reports of separation at this join, especially with PocketShips that have a removable tabernacle as I am planning on employing.


I continued the front fiberglass over the inside edge of the bow.


Here is my table saw jig setup for cutting the 10:1 scarfs for the rub rail.  This jib worked immensely well at cutting perfect scarfs.  Took literally 10 minutes to build.


If you look at the stack of wood just to the left of the white PVC you sees all the consistent scarfs cut with the jig.  I chose to make the rub rails out of black walnut because I love the way it looks when varnished.  It has a deep brown/black color with lighter grain patterns.


The PVC pipe is my steaming box.  After a failed attempt as getting the walnut to bend around the bow I decided that I would steam bend it.  The PVC pipe is 7' long and has a brass nipple at one end to attach the steam generator.  I've already tested it and it should do the trick.


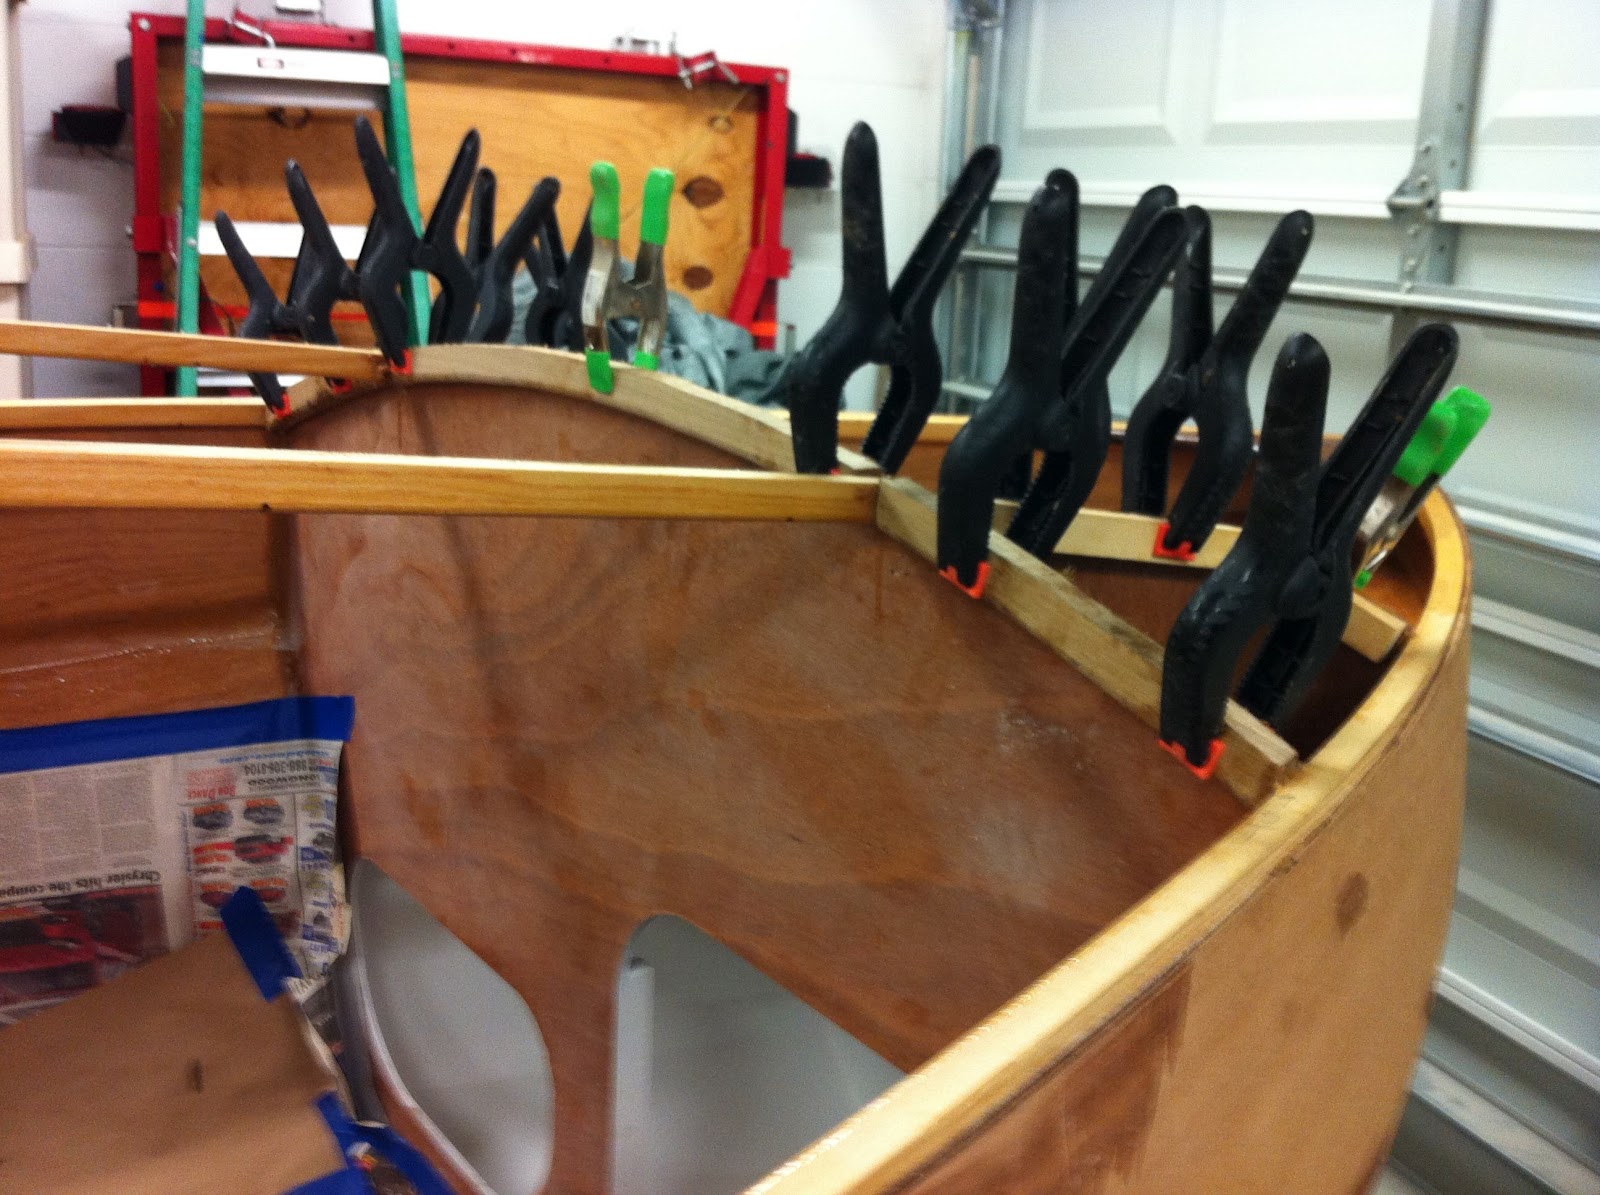
I also used the block walnut for the toe rails.  The bend needed here isn't as severe as at the bow.  I was able to achieve this bend with no problem.


Hours total: 450

Friday, December 21, 2012

Finished Cockpit Glassing

So 25 yds. of new fiberglass arrived on Tues.  Since everything was prepared I rolled out a length for the center of the cockpit including the foot well.  This was by far the most challenging fiberglassing I've done to date.


The geometry of the footwell in combination with the front of the cockpit and the transom makes for some interesting curves and bends.  I cut darts and overlaps where I thought it made sense and smoothed everything out.  Again, trying to get everything as close and as smooth as possible before mixing a drop of epoxy.


I started laying down the resin with the center of the footwell and worked my way out and up the sides.  I had to do this while sitting in the cockpit and trying to avoid disturbing the dry glass that was there.  This involved some pretty strange contortions where at times I was on one knee with a leg hanging out of the boat while leaning over the footwell.  I had a difficult time with getting out all the bubbles in the corners and to a lesser extend the bottom edges of the footwell.


From there I moved on to the forward center section of the cockpit right behind the companion way opening.  This being flat was much easer to do.

The rest of the area to be epoxied could be reached from outside the boat and also flat so it was much easier to do.

Upon inspecting the work I noticed that I still had some moderately sized bubbles and lifting in the corners and along the edges of the bottom of the footwell.  I went back and worked out as many of these as I could.


After about 2 hours (using slow hardener) I went back to check the work and some of the bubbles had returned (or I just missed them in the first place).  I put on a latex glove dipped my finger in alcohol and pushed these back down.  That did the trick for most of them.


After drying I noticed a few small bubbles that I will have to take care of and there will be some sanding in the corners to remove a few rough strands of glass.  But it is a step done.  From here out the glassing should be MUCH easier.


 Hours this session: 4
Hours total: 443

Wednesday, December 12, 2012

Glassing the Cockpit

After getting the cabin top glued down I went to work rounding everything off.  I did most of this work with a sanding block and 60 grit sandpaper.  It was pretty easy work.  I also did some filling of cracks, divots and holes that I incurred during the process of building.


I rolled out the last of the fiberglass that came in the kit.  I knew I was going to run out of this because I chose to fiberglass a lot of areas that aren't called for in the manual.  These included the bottoms of the seats and the bottoms of the foredeck and cabin top.  I ordered more from CLC.


I laid out the glass and cut darts to fit the corners.  Using a large "wallpaper brush"  I brushed and stretched the fabric.  Instead of using my normal roller and squeegee method I saturated the cloth using a cut-down chip brush to keep the fabric stretched out as much as possible while I was wetting it out.


For this round of fiberglassing I chose to use a technique that was outlined in a video I found at OffcenterHarbor.  This is a for-pay web site that has a lot of information about small wooden boats.  The video was one that shows how to fiberglass a stitch and glue kayak.  But the techniques that were demonstrated seemed like a method would also work for me.


In the end the technique worked nicely and I felt very much more in control of the wet-out process.  As I got better with it the technique the results improved the starboard side was done first.  The port side used noticeably less resin and I had less pooling as I learned the technique.  The final results on both sides were very good.  I actually look forward to do the cabin top and the bottom of the boat with the same technique.


The footwell and set centers will be done next.  I'm waiting for more fiberglass to arrive so that I can continue.


Hours this session: 10
Hours total: 439

Sunday, November 18, 2012

Cabin Painting and Deck Install


Painted the insides of the cabin in preparation for installing the cabin decking. I used a scheme that was inspired by Jeff Hatch's build. Turned out very nice.


With some help from my beautiful wife I was able to drop the cabin roof directly on the correct spot. I had to hurry to get all the screws in and tightened down before the epoxy set up. Had to rush to get the internal squeeze out cleaned up. In the end I got the job done and had another success.


After the screws were removed I removed the overhang with a router and a cutoff bit and then used a grinder to sand the edges flush. I also removed the companion way spacer from the companion way bulkhead. Now it's MUCH easier to get in and out of the cabin. Feels good to get that last large piece of plywood in place.

Hours Total: 435


Location:Jackson Woods Ct,Meadow Woods,United States

Saturday, November 10, 2012

Getting ready for the cabin top

After doing some trimming, clamping, swearing, adjusting, swearing and clamping I finally got the transom skirt in the proper place and epoxied down.  Didn't make too much of a mess of it.  Nothing that can't be scraped or sanded off. 


After a little sanding it looks good.  I made the bottom lamination from cypress and then used white oak for the top.


The ends really look nice feathered into the seat back tops.


Its amazing how very strong and solid that it makes the transom and consequently the whole boat.  The plans call for a oarlock for a yuloh.  I was afraid that it wouldn't be strong enough to support the pressure of using a device like that on the top of the transom skirt.  I'm not worried anymore.  I'm sure that the construction will easily stand up to that kind of use.


The plan is to leave most of bulhead #2 bright with white trim edging that will be trimmed with marine vinyl tape.  In addition I wan to leave the edges of the dorade vents and windows unpainted so that I can glue trim rings on later.  There will be about a 1" white border around the bulkhead openings.


Like many others I'm creating a bright (unpainted) area on the back of the companion way bulkhead.  Again the rest will be edged in white with a vinyl border.  The above will be primed and then painted.

Hours total: 420

Sunday, October 14, 2012

Seat Back Tops and Electrical Panel

Filled the seat backs with expanding foam ala Jeff Hatch's pocket ship.  Great idea and works nicely.  The amount that Jeff recommends to purchase seems dead on.  Glad he did the math and I didn't have to!

After the foam was trimmed off and the tops were glued on I used a cut-off bit in my router to remove the excess top.  This worked nice but still needed cleaning up to bring it flush with the seat back and the hull.


I built the electrical box and marked its location on bulkhead #2.  With trembling hands and sweaty palms I used my jig saw to make the cut out.  Turned out dead on.  As did the dorade vent openings that I cut with a 4-1/2" hole saw.  Note the hole on the right side of the electrical box.  This will be where both the battery and circuit wires will enter/exit.


This is the electrical panel.  The cut outs are for a rotary main circuit switch and a 4 circuit switched fuse box.  It mirrors the lower cutout and will be hinged at its bottom and painted white.  Hopefully this will give bulkhead #2 a little bit of symmetry.


Her is the bottom layer of the transom skirt edging bent into place.  It takes a lot of clamps to hold it perfectly in place.  Right now it's not glued in position.  I sprayed this down with water after it was in position so that it will (hopefully) retain some of the curvature and be easier to reapply when it is dry.


Hours total: 410

Friday, September 28, 2012

A Milestone (sorta)

It's strange how you count milestones when working on a long project like the Pocketship.  It seems that events I thought would be memorable moments dissolve quickly into the shadowy past.  Accomplishments like completing the keel, then the lower hull, the upper hull the decking and the list goes on, seemed like moments to rejoice.  In reality they become a minor footnote and a transition to the next perceived milestone.

After several iterations of this I decided my milestones would be based on consumption.  Every time I used up the last of a material, I made a mental note.  I seem to get more pleasure from watching my stockpile of parts dissolve into a boat then I do for any particular accomplishment on the boat.  Don't get me wrong, I'm really proud of what I've done so far.  But for some reason it's easier for me to measure my accomplishment on how much of the supplies have been exhausted.


With that in mind today, while sealing the cabin top with epoxy I used the last of my first 5 gal. container of resin.  That's a LOT of resin.  I'm far past the 1/2 way mark so I'm sure I won't completely exhaust the last 5 gals.  It was kind of a neat thrill throwing away the old plastic jug and replacing it with a new one.  Seems like a silly thing to get a thrill from!


Since the last entry I spent time painting the inside of the storage bins in the seat backs.  They look pretty good if I do say so myself.  Once that was done I was clear to install the seat backs.


These went in very easy.  The upper sides were clamped and the lower were held in place with stainless steel brads.  Except for the area around the storage bin.  No brads there just pressure from some heavy weights.


I also spend a considerable amount of time planing the carlins for the dorade boxes and the cabin roof.  I tried to use a power planer for this and almost had a catastrophe.  Too many curves to work so I just did it by hand using planes and a spokeshave.


While the seat backs are drying I sealed the underside of the cabin.  I was going to get my artist daughter to paint some sort of cool design there before I installed it but it looks like her college schedule is going to be too busy.  I'll probably just leave it bright.

Hours total: 401

Sunday, September 16, 2012

Dorade Vents

Weather here in FL is marginally cooler.  Now I can work in the garage without looking like I took a shower after 30 minutes.

The donate vents are up next.  Pretty easy although there was quite a bit of fiddling with the angle.


I also took the opportunity to add the carlins at the #2 bulkhead.  These were milled from white oak and  look quite nice.


Support was also added to the inside of the dorade vents.


 Carlins were added to the companion way bulkhead.  All of this construction will support the deck.


Hours total: 385

Wednesday, August 22, 2012

Odds and Ends

Wow!  Two months have gone by since my last post.  As you know from my prior posts it's hot in FL and I'm not doing too much work.  When it's over 90 (and more in the garage) the epoxy sets up way too fast for doing anything more that small glueing tasks.

I've been concentrating on the stuff I can do.  I've finished with the seat back framing and installed the transom skirt.  Up front I fiberglassed the anchor well and installed the breast hook.

The seat back framing went pretty easy.  Reminds me of building an model airplanes and installing the fuselage stringers.  Pretty straight forward.  The upper two need to be beveled so that they are even with the framing tops and each other such that the seat back tops will fit flat and be perfectly horizontal.  In the manual they use a block plane to do this.  I tried this for the starboard side and it worked well but on the port side I decided to experiment with a spoke shave.  The spoke shaved worked MUCH better for me and I was able to do the same job in less than 1/3 of the time.


One problem is that after I did all the framing I test fitted the seat back panel and although it fit perfectly on the transom side it was around 1" short of abutting the companion way bulkhead.  I don't know where I went wrong.  I've got a plan to just do a splice with biaxial tape on the outboard sides (so that they can't be seen) to add some length to these pieces.  I don't know where I went wrong, all my follow up measurements seem to verify that everything is in the right place.  Hmmm.


The transom skirt and the block that support them were a bit of a challenge.  I cut and recut the mounting blocks.  They're actually pretty complex since the transom mounting face is beveled in two directions.  Had a couple of false starts but I wrestled them into submission.  The transom skirt itself gave me some fits.  Didn't know if I should align it to the rear or front edge of the transom.  I struggled with it for a couple of hours and then decided to give it a break.  Glad I did I was looking at the manual and found a nice side view sketch on page 177 that answered all my questions.  Installation went without problems after that.


The fiberglassing of the anchor well was a little scary for me it's hot here and I needed to move fast or make a mess of the job.  In addition I have to do my final cuts after I start to anchor the fiberglass down.  Usually when I can't use my normal method of taping off the area to be fiberglassed so that later I can trim to the edge of the tape I find that I make a mess of the edges of the fiberglass with strands coming off and polluting my work.  I carefully laid everything out and rehearsed the way I would do it.  In the end it turned out to be a non-event and the layout is one of the best fiberglassing jobs I've done to date.


Cleaned up and used a router to round over the upper breast hook and installed that with very little problem.  Looks nice!


Hours this session: 20
Hours total: 369


Sunday, June 17, 2012

Seat backs and other framing

With the upper sides in place is was time to tackle the upper front battens.  These take on quite a bend and I fiddled with them for a long time to get them to go where I wanted them.  Lots and lots of clamps helps.  I had to keep reminding myself that these will be beveled before the cabin top is laid in place.  Finally I bit the bullet and mixed epoxy.  Once in and cured these battens added an amazing amount of stiffness to the boat.  It was also at this time that I added the battens that span the cabin roof as shown below.


Next I chose to add the fillets to the companion way bulkhead.  The manual warns you to make this look good since everyone will be able to see it.  Working wet on wet I created some nice fillets and then while they were still pliable I added the fiberglass tape.  It looks pretty good.  I don't think that I will be ashamed of it.


In addition to laying the biaxial tape along the lower edge I did like I've seen several other builders do and added some tabs to the vertical fillets that will end up on the inside of the seat backs.


At this point the manual wants you to glass the anchor well and install the upper breast hook.  I deviated from this because I don't want to tackle a large fiberglassing job in Florida's summer heat.  I went on to framing the seat backs.  This is more fun for me because I can see something happening.

The first problem was getting the lower batten cut with all the right angles.  I thought that this would be tough but it was actually pretty easy once I got the table saw set up correctly.  They both came out perfect the first time.  Ya gotta love when that happens.

Getting the curve sprung was also easy.  Since the lower batten is smaller than the upper front batten it sprung around the curve with no feeling like it was going to break or split.  A few well placed temporary screws held it easily in place while it dried.


Here you see the small bulkhead brace epoxied in place and held with temporary screws.  This will be the mounting point for the front ends of the upper seat back supports.


Another batten will go where the line is drawn to add support to the front of the seat backs.


 And a parting shot of the cabin roof supports.


Hours this session: 20
Hours total: 329