Tuesday, March 26, 2013

The Rudder

The manual has a little bit of an out of order sequence.  I'm trying to get to the point where I can roll this beast over and work on the bottom.  One of the steps before rolling is to cut a hole in the transom for the tiller.  In order to do this I need to build the rudder so that I can mark the correct place for the hole.  Building the rudder is a few chapters later.  So I had to work a little out of order to complete the task.  One of the VERY FEW shortcomings I've found in an otherwise outstanding manual.


The rudder requires milling some structure to build in the airfoil taper.  This required strategic beveling of the framing.  Not hard but requires attention to detail.  In the kit there are templates for all of these pieces and they fit very well when cut accurately.


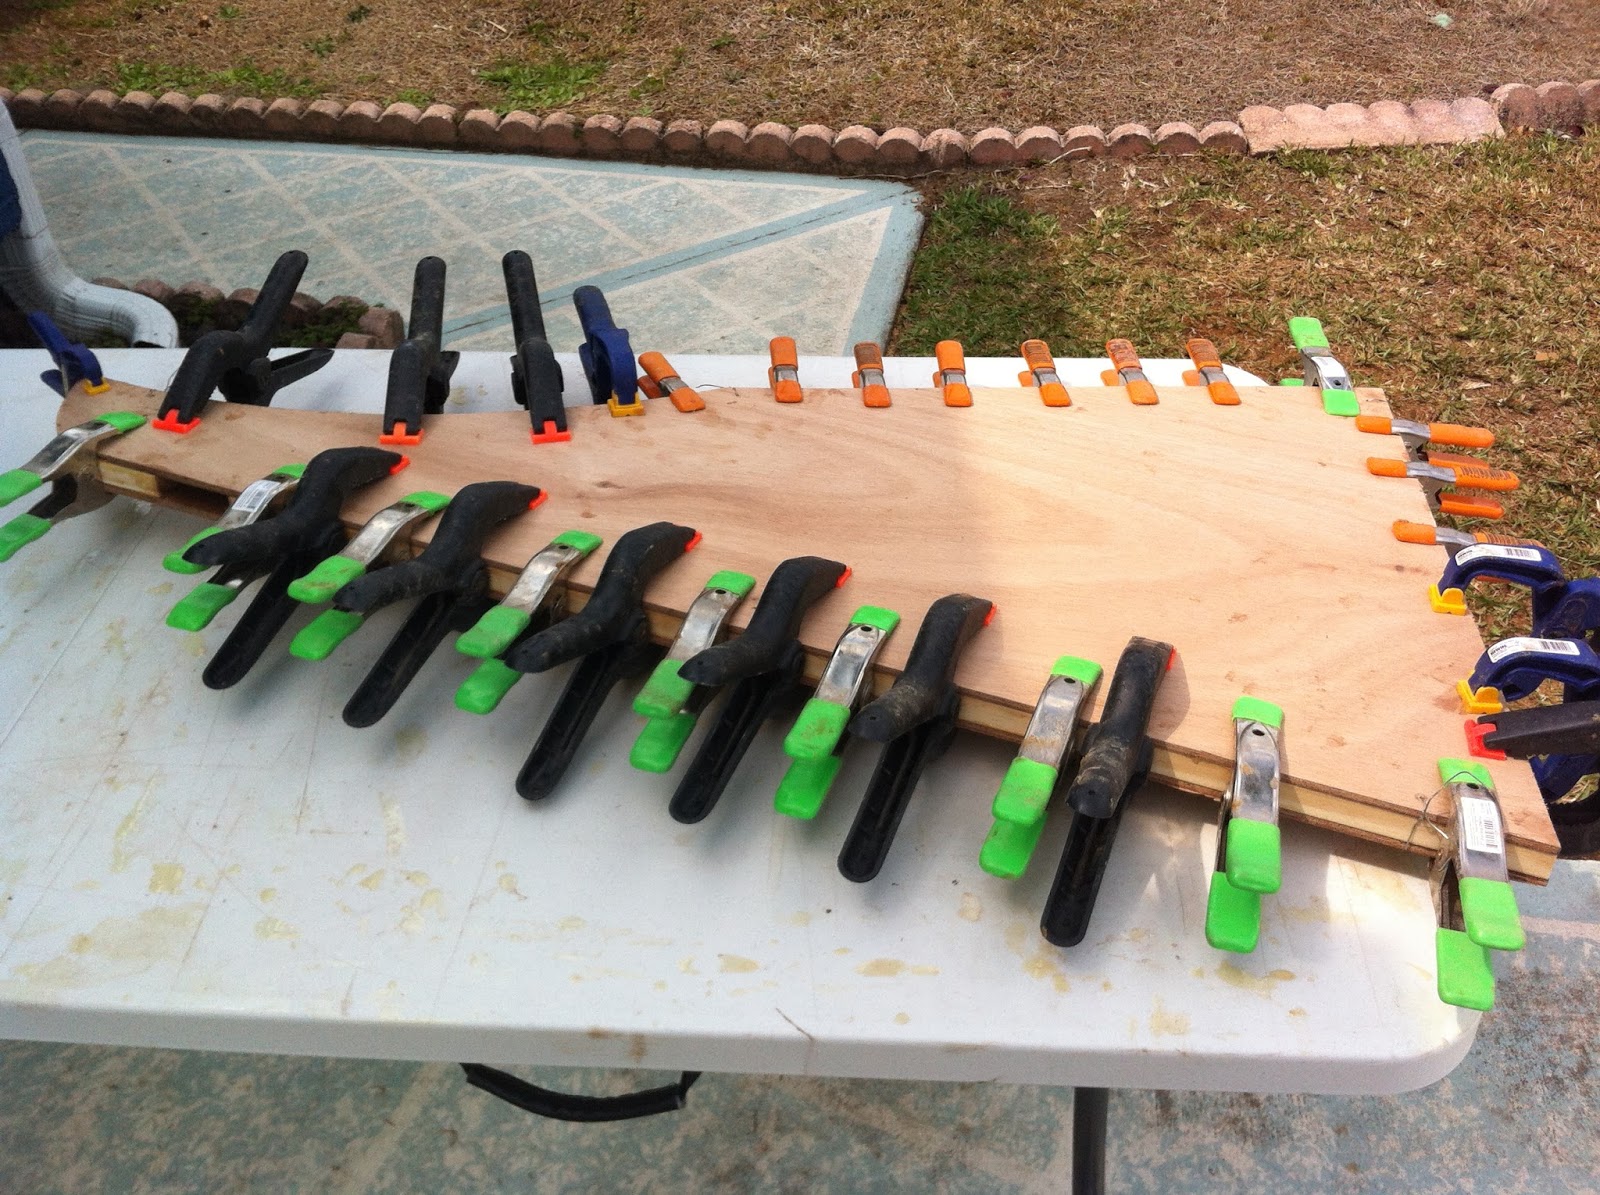
As you can see this thing need a lot of clamps.  I needs to be watertight when it's finished so pay close attention to the joints in the framing.  I had one that was a little open and when I checked to see if it was leaking (by blowing into it, I'm glad no one was around to see that), it was.  A little thickened epoxy fixed that.


The bottom plate adds authority to the rudders effectiveness and according to the manual acts as a makeshift re-boarding step.  I glued and screwed it on then checked for squareness.  I lucked out and it was dead on without any adjustment.  I used 4 screws to attach.  The manual only shows three but I put in four but what the heck, I splurged.


I feel like I'm really getting the hang of the woodworking (gee Bill, it's only taken you 2 years) and now I have many less "false starts" or "do overs" than I did when I first started building.

Next up, finishing the rudder.


Hours this session: 8
Total hours 490

Friday, March 22, 2013

Working Scared

In this installment of the never-ending build, I perform the scariest thing I've done such pouring lead.  That being cutting the hull for the dorades, hatches, and portholes.  You can't imagine my angst at setting a blade to that which I had spent so much time creating.  It ain't right.

Before I attempted this work I finished filling the weave on the fiberglass by adding 2 more coats of epoxy on the rub rail and everything above it.


Everyone has heard measure twice and cut once.  Well I must have measured this stuff about 8 times and I still didn't feel good when I grabbed my saw.  The first cuts I made were for the storage hatches.  I took one of the hatches and used it's base as a template.  The hardest part about this was holding it in place while I traced the opening.  The hatch would slide and I would have to start over.  It was difficult maneuvering the pencil around the corner between the seat back and the transom.  Eventually, I got them both marked correctly and cut out with the jig saw.  A follow up with the hatch showed that I got it about as perfect as I could expect.  Very snug fit.


The portholes were already scored for me.  I cut to the INSIDE of the scoring so that I would be sure that I wouldn't make a mistake I couldn't easily fix.  Doing that left about 1/8" of extra that needed to be removed around the outside edge.  I did this very gingerly with a Dremel tool and a sanding wheel.  I tested it with the precut plexiglass provided by CLC and found that although I'm very close to the right size they're still a little small and I need a few more passes with the Dremel to finish this up.


The dorade vents were a little easier.  They don't have to be perfect since the trim ring will hide any issues.  Test fit went well.


Moving on to the rudder.

Hours this session: 6
Total hours 482

Saturday, March 9, 2013

Companion Way Hood/Hatch Finished

I haven't stopped working but the progress has slowed a little bit.  Not because of anything except that I haven't had much free time lately.  Oh well, I don't have any target date for this to be finished so it doesn't really matter.


The hood is made out of black walnut on the sides and white oak on the front and pull.  Nice looking, but like it says in the manual it requires a little bit of woodworking.  There are bevels to plane to make it fit the top of the cabin correctly, curves to match, pulls to make and it all has to slide correctly when mounted on the boat.  It took me quite a bit of adjusting and screwing around to get it to look/act right.


The hatch is pretty much the same.  Sides of black walnut and the front, back and pull made from white oak.  Looks good now and I expect it will look a lot better when its all finished nicely.  I added the compass rose inlay to the top of the hatch.  It comes from CLC was easy and fun to do with great results.  A little expensive but very high quality veneer.


The tops and sides are fiberglassed.  It'll need two more coats of epoxy before final sanding.

Next up I need to cover the entire boat and the hood/hatch assembly with two more coats of epoxy so I can finally roll this thing over.

Hours this session: 8
Total hours 476